Soil Test Kit: What It Is and How to Use It
Understanding your soil’s composition is key to achieving a thriving garden, which is where a soil test kit comes into play. This essential tool not only helps you identify nutrient deficiencies but also informs you about pH levels, allowing for better plant choices and healthier yields. It can transform your gardening experience.
What Is a Soil Test Kit Main Points
- Checks soil health
- Tests soil pH
- Measures main nutrients
- Helps identify nutrient deficiencies
- Can be used at home
- Some tests require a lab
- Helps choose the right fertilizer
- Prevents unnecessary fertilizer use
- Helps you understand soil conditions
- Reduces guesswork in lawn care
Why Soil Testing Is Important Main Points
- Helps understand soil condition
- Identifies soil pH problems
- Finds nutrient deficiencies
- Helps explain thin or yellow grass
- Helps detect problems before fertilizing
- Prevents wasting money on the wrong fertilizer
- Helps choose the right fertilizer
- Helps identify soil problems affecting plant growth
- Supports better lawn and garden planning
- Helps avoid unnecessary fertilizer applications
- Soil testing should be done before major fertilizing decisions
Who Should Use a Soil Test Kit Main Points
- Homeowners with weak or uneven grass
- DIY lawn care users planning to fertilize
- Home gardeners growing vegetables or flowers
- People starting a new lawn
- Homeowners dealing with recurring lawn problems
- Gardeners wanting to improve plant growth
- Food plot or hobby growers
- Anyone unsure about soil pH or nutrient levels
- People who want to avoid unnecessary fertilizer use
- Anyone planning major soil or lawn improvements
Soil Test Kits vs Lab Testing
Soil test kits come in three primary varieties.
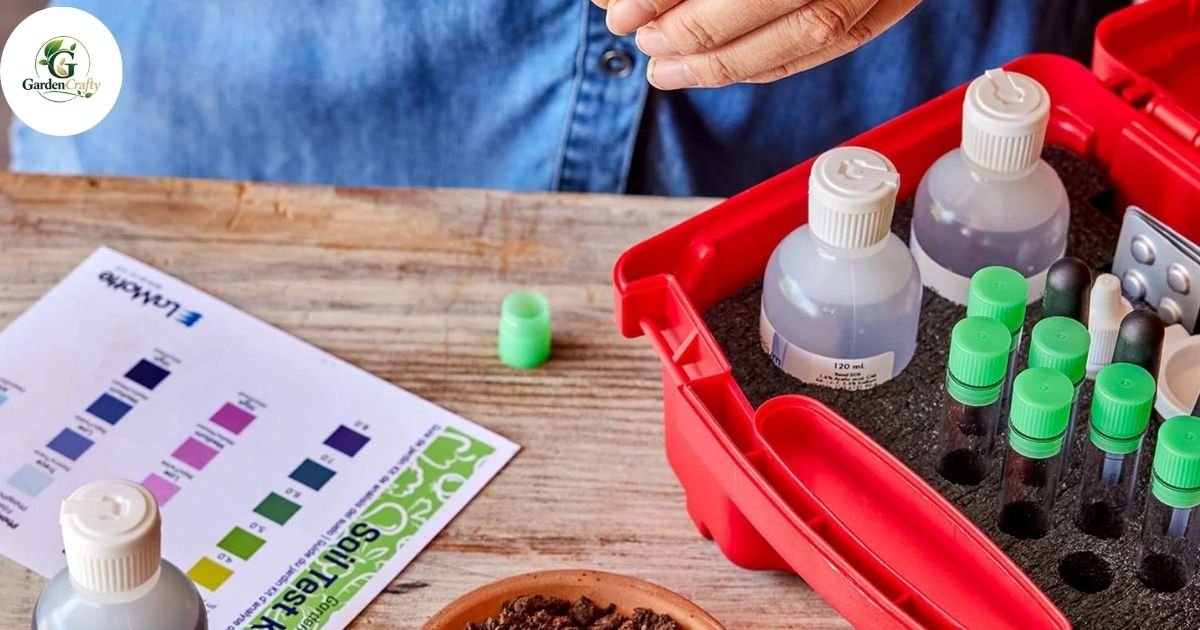
Home Color Test Kits
These kits make use of liquids or powders.
You combine water and soil.
Results are displayed in a color chart.
Best for:
- Quick soil checks
- Small lawns
- Home gardens
- Basic nutrient and pH testing
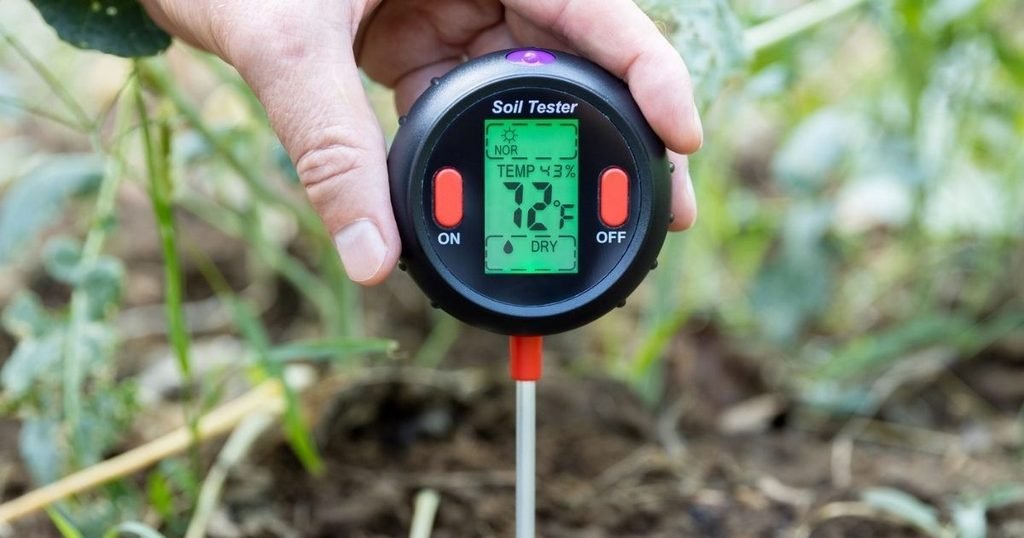
Digital Soil Test Kits
These kits use probes or meters to measure soil conditions.
They provide fast readings that are easy to check.
Accuracy can vary depending on the brand, soil conditions, and proper use.
Best for:
- Quick spot checks
- Fast readings
- Checking multiple areas
- Regular soil monitoring
Mail-In Soil Test Kits
You collect a soil sample and send it to a professional laboratory.
The lab analyzes the sample and sends you a detailed report.
These tests can provide more detailed information about soil pH and nutrient levels.
Best for:
- Large lawns
- Gardens with recurring problems
- Food plots
- Detailed soil analysis
- Planning fertilizer applications
Soil Test Kits vs Lab Testing
Home soil test kits are simple and affordable.
They give quick results and help you understand the general condition of your soil.
They are useful for checking basic soil pH and nutrient levels at home.
Results may be less detailed or accurate than professional testing.
Lab soil tests cost more and usually take longer.
They provide detailed nutrient numbers and a more complete soil analysis.
Many lab tests also include fertilizer recommendations based on your soil results.
This can help you choose the right fertilizer and avoid unnecessary applications.
Home soil test kits are best for:
- Quick soil checks
- Basic pH testing
- Learning about your soil
- Small lawns and home gardens
- Simple troubleshooting
Lab soil tests are best for:
- Detailed nutrient analysis
- Recurring lawn problems
- Large lawns or gardens
- Planning fertilizer applications
- Major lawn or garden improvements
Use a home kit for quick learning and basic checks.
Use a lab test when you need detailed results for better lawn or garden planning.
Accuracy Differences Between Home Kits and Lab Tests
When it comes to assessing soil health, home soil kits offer convenience and accessibility for basic lawn and gardening enthusiasts. The accuracy of these kits can vary significantly. While they may provide useful general insights into pH and nutrient levels, their limited scope often falls short of the comprehensive analysis that lab soil tests deliver.
Home kits typically use simple chemical reactions that can be influenced by various factors, such as soil composition and environmental conditions, leading to potential misinterpretations.
Lab soil tests leverage advanced methodologies, giving you a granular view of soil nutrients, contaminants, and organic matter content. These tests utilize precise measurement techniques and can detect trace elements that home kits might overlook.
For serious gardeners or farmers aiming for optimal yields, the investment in a lab soil test can be transformative. Understanding these differences empowers homeowners to make informed choices, balancing the ease of home kits with the depth of lab analyses to cultivate thriving gardens.
Do Soil Test Kits Check for Heavy Metals?
When considering the use of home soil kits, it’s essential to recognize that not all products are created equal, particularly regarding heavy metal detection. Common heavy metals like lead, cadmium, and arsenic can be insidiously present in urban or reclaimed soil, often from historical industrial activities or contamination.
Many home soil kits offer basic nutrient and pH testing but might fall short in their capacity to identify these toxic elements.Opting for a more specialized testing kit can provide peace of mind for gardeners and property owners alike. It’s vital to know that certain heavy metals can accumulate in plant tissues, posing risks not just to soil health but to our own.
Bringing awareness to this issue encourages a more comprehensive approach to gardening and landscape management, especially in urban areas or plots that have undergone reclamation. Informed soil testing can lead to safer gardening practices and promote the vitality of our ecosystems.
Step-by-Step: How to Use a Soil Test Kit
More important than the kit itself is accurate sampling.
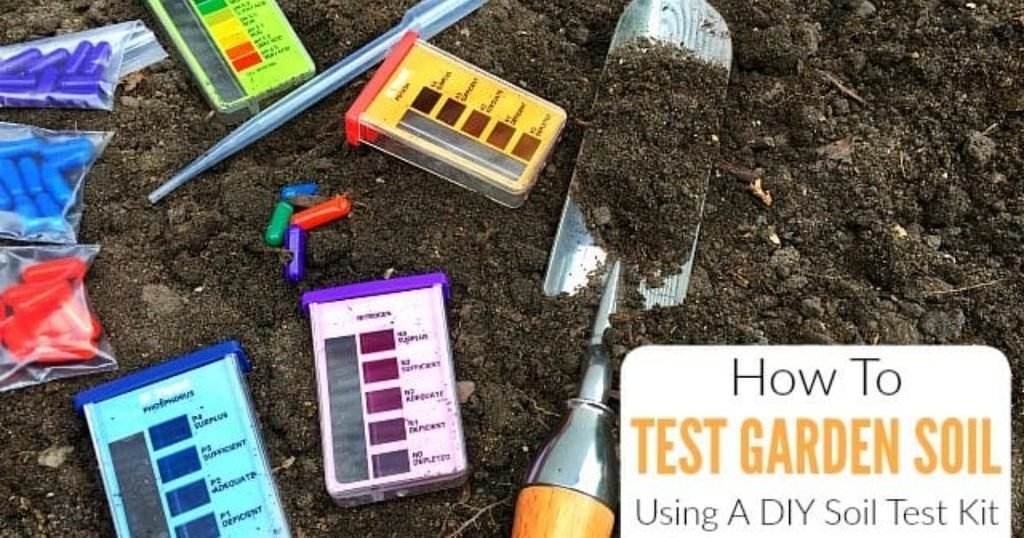
Collect Soil Samples
Collecting soil samples involves a meticulous process that can reveal the hidden treasures of your land. To ensure a representative sample, it’s essential to take soil from 4 to 6 spots around your property.
This scattered approach captures variations in soil type and nutrient content, giving you a broader understanding of your landscape. Aim to dig 4 to 6 inches deep; this depth strikes a balance between surface material and the earth’s more stable, nutrient-rich layers.
Timing is crucial to avoid wet soil, as excess moisture can skew results and lead to misleading conclusions. Incorporating dry, loose soil will yield more accurate readings when you analyze for pH levels and nutrient availability.
Embrace the beauty of this simple yet impactful task; each handful of soil tells a story, providing insights into what your plants need to thrive. Your garden can become a flourishing ecosystem, significantly influenced by the informed decisions you make from those samples.
Mix the Samples
To achieve the perfect blend for your gardening or landscaping projects, mixing samples of soil is essential. Begin by combining soil in a clean bucket, ensuring that any contaminants are minimized.
This not only provides a more consistent texture but also allows you to assess the various properties of your blend, such as drainage and nutrient content.
Before you start mixing, it’s crucial to remove rocks and roots from your soil. This step not only enhances the look and feel of your mixture but also ensures that your plants will have room to grow and thrive without obstruction.
By creating a well-aerated and nutrient-rich sample, you’re setting the stage for healthy plant development. Experiment with different ratios of sand, silt, and clay to discover what works best for your specific plants your garden will thank you!
Run the Test
When diving into any project, especially those involving tests or experiments, meticulous adherence to protocol is paramount. Following kit instructions ensures that every variable is accounted for, minimizing the room for error and maximizing your chances of achieving reliable results. It’s easy to overlook the importance of each step, but even minor deviations can lead to unexpected outcomes.
Think of it as the foundation of a house; if the base is unstable, everything built upon it is at risk.Equally crucial is the use of clean tools and water. Contaminants can skew results, creating a cascade of inaccuracies that are often hard to trace back. By prioritizing cleanliness, you’re not just ensuring precision; you’re fostering a disciplined mindset that can be beneficial in various aspects of life.
This approach underscores the significance of attention to detail, reminding us that doing things right whether in a lab, kitchen, or any field reflects a commitment not only to the task at hand but also to the integrity of our results. Embracing these practices not only amplifies the joy of discovery but also builds a solid framework for informed decision-making.
Read the Results
Reading the results is more than just a simple glance at the data; it’s about unlocking insights that can shape future decisions. When you meticulously match colors or categorize findings, you create a visual narrative that can highlight trends and discrepancies.
By doing this, you not only enhance comprehension but also invite your audience into the story behind the numbers. A well-structured report serves as a roadmap, guiding you through the journey of discovery and allowing you to see beyond the surface.Taking the time to write results down can transform them from abstract data points into tangible action items.
This practice not only solidifies your understanding but also creates a reference for future evaluations. Reflect on the implications of your findings what patterns emerge, and how do they align with your goals?
Engaging with your results in this way can reveal opportunities for growth and innovation, providing a foundation for more strategic decision-making. The real power lies not just in collecting data, but in what you choose to do with it.
Common Mistakes to Avoid
Many incorrect soil test results come from simple sampling or testing mistakes.
Following the test instructions carefully can help you get more reliable results.
- Testing soil right after fertilizing
- Taking soil from only one spot
- Using dirty or contaminated containers
- Collecting soil from areas with mulch or grass debris
- Using too little soil for the test
- Mixing soil samples incorrectly
- Testing very wet soil without following kit instructions
- Reading color charts in poor light
- Using expired testing solutions
- Skipping the test instructions
- Using the same sample for different areas with different soil conditions
What Nutrients Does a Soil Test Kit Measure
Most soil test kits check the main nutrients that plants need for healthy growth.
They may also test soil pH, which affects how easily plants can absorb nutrients.
| Nutrient | What It Affects | Common Problem Signs |
| Nitrogen (N) | Leaf and grass growth | Yellow leaves or weak growth |
| Phosphorus (P) | Root development and flowers | Poor rooting or fewer blooms |
| Potassium (K) | Plant strength and stress tolerance | Weak stems or stress damage |
| Soil pH | Nutrient availability | Poor growth despite fertilizer |
| Calcium (Ca) | Cell strength and root growth | Weak growth or poor root development |
| Magnesium (Mg) | Chlorophyll and healthy leaves | Yellowing between leaf veins |
| Sulfur (S) | Protein formation and plant growth | Pale leaves and slow growth |
Common results include:
- Nitrogen (N) for leaf and grass growth
- Phosphorus (P) for root development and flowers
- Potassium (K) for plant strength and stress tolerance
- Soil pH for acidity, alkalinity, and nutrient availability
Some mail-in lab tests may also measure:
- Calcium for root and plant growth
- Magnesium for healthy leaves and chlorophyll
- Sulfur for plant growth and protein formation
How to Read Soil Test Results
A soil test report shows key details like pH and nutrient levels such as nitrogen, phosphorus, and potassium that reveal your soil’s health. Understanding these values helps you choose the right fertilizers and amendments, so your plants get exactly what they need to grow well.
Soil pH
Soil pH shows how acidic or alkaline the soil is.
A low pH means acidic soil, while a high pH means alkaline soil.
Most lawns and garden plants grow well when soil pH is around 6.0 to 7.0.
When pH is too low or too high, plants may have trouble absorbing important nutrients.
Why soil pH matters:
- Affects nutrient availability
- Supports healthy root growth
- Helps plants use fertilizer properly
- Can affect grass and plant growth
- Helps identify soil problems before adding fertilizer
Nutrients
Soil tests show whether important nutrients are low, adequate, or high.
This helps you decide whether your lawn or plants actually need fertilizer.
- Low results may mean the soil needs additional nutrients
- Adequate results mean no extra fertilizer may be needed
- High results mean avoid adding more of that nutrient
- Too much fertilizer can damage plants and waste money
- Use test results to choose fertilizer more carefully
What to Do After You Get Results
Once you receive your soil test results, use them to decide what your lawn or garden actually needs.
Avoid making large changes based on one test result alone.
Low pH:
- Add lime to raise soil pH
- Follow the recommended application rate
- If you are unsure how to apply lime correctly, read our guide on how to apply lime to your lawn
- Retest the soil after some time to check the change
High pH:
- Consider sulfur to lower soil pH
- Add organic matter when appropriate
- Follow the recommended application rate
- Retest the soil before making further adjustments
Low nutrients:
- Use a fertilizer that supplies the needed nutrient
- Apply only the recommended amount
- Choose a fertilizer based on your soil test results
- Avoid adding nutrients that are already at adequate levels
High nutrients:
- Stop adding extra fertilizer containing that nutrient
- Avoid unnecessary fertilizer applications
- Allow soil levels to decrease naturally over time when appropriate
Cheap Soil Test Kits vs Mail-In Soil Test Kits
Cheap home soil test kits are useful for quick and basic soil checks.
Mail-in soil tests cost more but provide more detailed results from a professional laboratory.
| Feature | Home Soil Test Kit | Mail-In Soil Test Kit |
| Cost | Low | Medium to High |
| Accuracy | Basic | Generally Higher |
| Results Format | Low / Medium / High | Exact numbers and detailed reports |
| Time Needed | Minutes | Usually several days |
| Testing Method | Test at home | Soil sample sent to a lab |
| Nutrients Tested | Usually basic N, P, K | More nutrients may be tested |
| Fertilizer Advice | Limited or none | Often included |
| Best For | Small lawns and gardens | Large areas or recurring problems |
Cheap home kits:
- Lower cost
- Fast results
- Easy to use at home
- Best for learning soil basics
- Useful for small lawns and gardens
- Results are usually general
- Good for quick soil checks
Mail-in soil test kits:
- Higher cost
- Slower results
- Professional laboratory testing
- Detailed soil reports
- More precise nutrient information
- Often include fertilizer guidance
- Better for recurring soil problems
- Useful for planning fertilizer applications
Cost and Turnaround Comparison
| Test Type | Typical Cost Range | Results Time | Best For |
| Home Soil Test Kit | $10–$80 | Minutes | Quick pH and basic nutrient checks |
| Mail-In Soil Test | $30–$75 | 3–10 days | Detailed nutrient reports |
| Full Laboratory Test | $60–$150+ | 7–14 days | Exact nutrient values and advanced testing |
Keep in mind:
- Prices vary by brand and testing company
- Some kits test only pH and basic nutrients
- Mail-in tests may include fertilizer recommendations
- Advanced lab tests can check more soil properties
- Choose a test based on the level of detail you need
What Soil Test Kits Do Not Test
Many soil test kits focus only on basic nutrients and soil pH.
They do not provide a complete picture of every soil condition that can affect plant growth.
Most home kits do not check:
- Soil texture
- Soil microbes
- Drainage quality
- Soil compaction
- Full organic matter levels
- Soil structure
- Water-holding capacity
These factors may require professional testing or separate soil checks.
Lab testing can provide more detailed information when you need a complete understanding of your soil.
How Often Should You Test Soil
Soil does not need to be tested every few weeks.
Testing at the right time helps you track changes and avoid unnecessary fertilizer applications.
Lawns:
- Test every 2 to 3 years
- Test sooner if grass becomes weak or growth changes
- Retest after major soil improvements when needed
Gardens:
- Test about once a year
- Test before planting when possible
- Retest if plants show ongoing growth problems
Food plots:
- Test before each planting cycle
- Use the results to plan fertilizer and soil amendments
- Retest when soil conditions or crop needs change
Retest your soil if:
- Plants continue to struggle
- Grass becomes thin or yellow
- You notice repeated nutrient problems
- You make major changes to the soil
Best Time of Year to Test Soil
Before planting, late winter or early spring is the ideal time to examine the soil. Testing can also be done in the fall, particularly after harvest.
Are Soil Test Kits Worth It
Yes, for the majority of people.
Repairing errors is more expensive than purchasing a soil test kit.
Time, money, and effort are all saved.
Even basic kits provide helpful guidance.
Helpful Resources
- 5+ Proven Fertilizer Guide: spring is the perfect time to feed your garden the right nutrients for strong, healthy growth. Choosing a balanced fertilizer helps plants recover from winter and thrive through the growing season ahead.
- Overseeding Fescue in Fall: a step-by-step guide for thicker grass that walks you through the best practices for filling in bare patches and boosting lawn density. Fall’s cooler temperatures and consistent moisture create ideal conditions for fescue seed to germinate and establish strong roots before winter sets in.
- How to Get Rid of Clover in Your Lawn? a brief guide to tackling this stubborn weed and restoring a clean, healthy lawn. With the right care and treatment, you can keep clover from taking over your grass.
- Grass Zones in the U.S.: how to select the best grass for your lawn based on your region’s climate and growing conditions. Understanding whether you live in a cool-season, warm-season, or transition zone helps you choose grass varieties that will thrive year-round.
- What Is Lawn Thatch? a simple guide for homeowners to understand this layer of dead and living organic matter that builds up between the grass and soil. Knowing when thatch becomes a problem helps you take the right steps to keep your lawn healthy and thriving.
- Will Grass Spread On Its Own? a useful guide to understanding how different grass types fill in bare spots naturally through runners or seed. Knowing your grass’s growth habit helps you decide whether nature can do the work or if overseeding is needed.
Final Thoughts
Utilizing a soil test kit is essential for any gardener or farmer seeking to optimize their soil health and crop yield. By understanding the nutrient levels and pH balance of your soil, you can make informed decisions about fertilization and amendments.
The simplicity and affordability of these kits make them accessible to everyone, whether you’re a hobbyist or a professional. With just a few easy steps, you can gain valuable insights that will lead to healthier plants and more productive yields.
So, don’t hesitate grab a soil test kit today and take the first step toward enhancing your soil’s potential.
FAQs
What is a soil test kit?
A soil test kit is a tool that allows you to analyze the nutrient content, pH level, and organic matter in your soil, helping you understand its health and fertility.
How do I use a soil test kit?
To use a soil test kit, collect a soil sample, mix it well, and follow the instructions provided with the kit to test for various components like pH, nitrogen, phosphorus, and potassium levels.
Why is testing my soil important?
Testing your soil is important because it helps determine the nutrient needs of your plants, guides fertilization practices, and enhances plant growth and productivity.
How often should I test my soil?
It’s recommended to test your soil every 1-3 years, or more frequently if you’re adding significant amendments or experiencing issues with plant growth.
Can I test my soil at home?
Yes, many soil test kits are designed for home use and are user-friendly, providing quick results for essential soil parameters.
What do I do with the results of my soil test?
After receiving your results, you can interpret them to adjust your fertilization strategy, amend the soil as needed, or change the types of plants you grow based on nutrient availability.
Are there different types of soil test kits?
Yes, there are various soil test kits available, ranging from basic ones that test pH and major nutrients to more comprehensive kits that analyze micronutrients and organic matter levels.
Where can I buy a soil test kit?
Soil test kits can be purchased at garden centers, agricultural supply stores, or online retailers, often with a range of options to suit different needs and budgets.